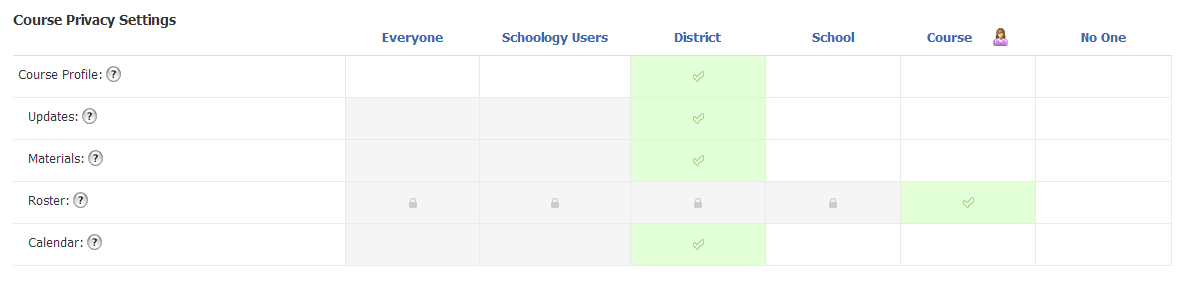
As we posted earlier, courses & groups can be made public, which means that a login wouldn't be required. However, if you want parents to see specific information about their student, including work submitted and assessment feedback, how do they access COLE 3.0/Schoology?
Like teachers and students, parent will access COLE 3.0/Schoology using http://my.cherrycreekschools.org. When they get to the login screen, s/he will log in using the account created for online parent forms. (If you have a parent who logs into my.cherrycreek but can't get to COLE 3.0, it is likely that the parent has an existing account with that email somewhere in Schoology's system. Disassociating their CCSD parent forms email from their existing Schoology account should solve the problem.)
Once logged into my.cherrycreekschools.org, parents will see several "tiles" that pertain to them. Clicking on the COLE 3.0. tile will take them directly into Schoology.

 Parents should be automatically associated with their children, so they will not need to enroll in courses or groups. All children associated with the account can be selected using the pull-down arrow in the upper right-hand corner of the screen.
For parents who don't have a parent forms account or need to create another one, there is an option on the my.cherrycreekschools.org login page to "create a new account."
 To create a new account, parents need to know some specific information about his/her child, including the student ID#. Admissions will verify that the parent is one of the legal parents
listed as a contact for that student. If the information provided
matches exactly to the Admissions system, an email will be sent to the
parent’s email address. The parent will need to click on the link in the email
to finalize the creation of their my.cherrycreekschools.org account.
To create a new account, parents need to know some specific information about his/her child, including the student ID#. Admissions will verify that the parent is one of the legal parents
listed as a contact for that student. If the information provided
matches exactly to the Admissions system, an email will be sent to the
parent’s email address. The parent will need to click on the link in the email
to finalize the creation of their my.cherrycreekschools.org account. New parent accounts will be able to access Schoology using this account within 24 hours, provided that they followed the steps above and Admissions was successful in verifying the parent.
Schoology Help has a section specifically targeting parent users, so this would be a good link to pass along as questions arise.